Running TechEmpower Web Framework with CloudFormation
TL;DR)
- I ran TechEmpower Web Framework Benchmarks with AWS CloudFormation
- Another step forward to continuously run benchmarks
Overview
This is continued from my previous articles:
- Running TechEmpower Web Framework Benchmarks on AWS on my own
- Detailed Steps for Running TechEmpower Web Framework Benchmarks on AWS
The full CloudFormation template file is available here, which does what I described in the latter of my previous articles.
CloudFormation makes it easier to set up and dispose the benchmarking infra on AWS, tweak the benchmarking environment to compare the results, so it's an important step for automating benchmark execution.
From the next section of this article, I will cover some CloudFormation specific things to note.
Reference
The official "Introduction to AWS CloudFormation" (3m01s)
VPC setup
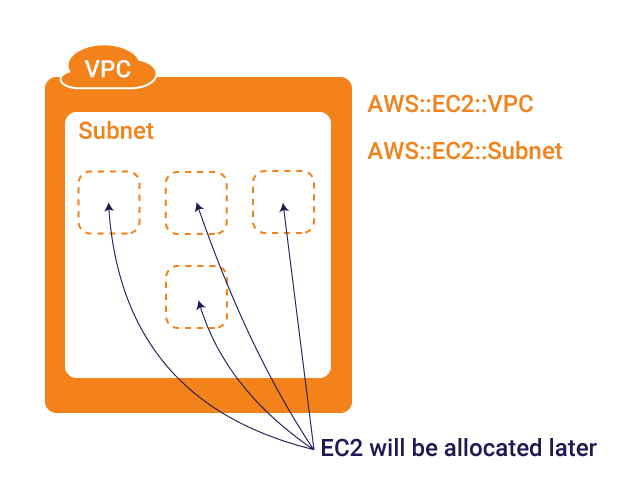
To get started, let's define the VPC and its subnet. Eventually we will allocate EC2 instances within the subnet, but that'll be discussed later.
Resources:
  # Define VPC and Subnet
  VPC:
    Type: AWS::EC2::VPC
    Properties:
      CidrBlock: 10.0.0.0/16
      Tags:
        - Key: Name
          Value: techempower-vpc
  Subnet:
    Type: AWS::EC2::Subnet
    Properties:
      CidrBlock: 10.0.0.0/16
      VpcId: !Ref VPC
      Tags:
        - Key: Name
          Value: techempower-subnet
So far nothing complicated.
Internet Gateway
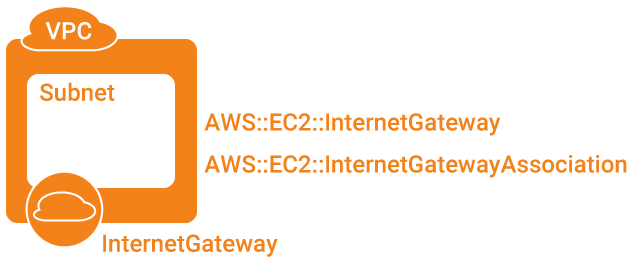
The next thing to set up is the Internet Gateway. Without this, you cannot interact with EC2 instances in the VPC.
# Define Internet Gateway and the attachment to VPC
InternetGateway:
  Type: AWS::EC2::InternetGateway
  Properties:
    Tags:
    - Key: Name
      Value: techempower-internet-gateway
VPCGatewayAttachment:
  Type: AWS::EC2::VPCGatewayAttachment
  Properties:
    InternetGatewayId: !Ref InternetGateway
    VpcId: !Ref VPC
Note that you need an explicit AWS::EC2::VPCGatewayAttachment
Route Table
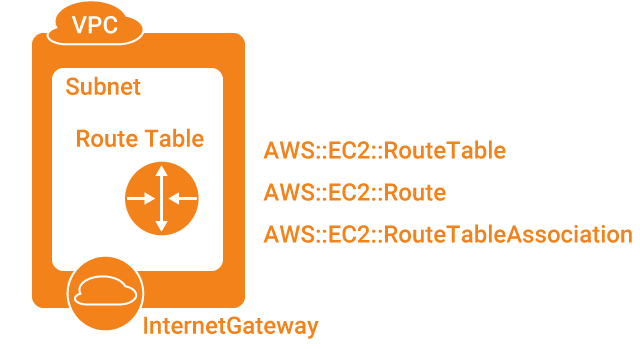
# Define Route Table, its Route, and associate the Route Table with the Subnet
RouteTable:
  Type: AWS::EC2::RouteTable
  Properties:
    VpcId: !Ref VPC
    Tags:
    - Key: Name
      Value: techempower-route-table
RouteInternetGateway:
  Type: AWS::EC2::Route
  Properties:
    DestinationCidrBlock`: 0.0.0.0/0
    GatewayId: !Ref InternetGateway
    RouteTableId: !Ref RouteTable
SubnetRouteTableAssociation:
  Type: AWS::EC2::SubnetRouteTableAssociation
  Properties:
    RouteTableId: !Ref RouteTable
    SubnetId: !Ref Subnet
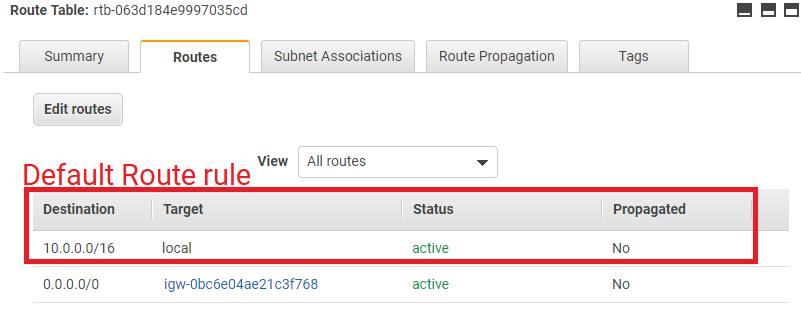
AWS::EC2::Route is a routeing rule for the AWS::EC2::RouteTable. Please be noted that the default rule as in the below screenshot is already given, without defining it in CloudFormation. The default rule defines local traffic handling rule within the Subnet:
Also, similar to the Interget Gateway, you need an explicit association with the Subnet, AWS::EC2::SubnetRouteTableAssociation.
Security Group
Here we configure Security Group. This is important for allowing SSH access from your local machine.
# Define Security Group and its inbound rules (= ingress).
# The outbound (egress) rules are automatically set as "Allow All".
SecurityGroup:
  Type: AWS::EC2::SecurityGroup
  Properties:
    GroupName: techempower-security-group
    GroupDescription: security group allowing SSH and ICMP
    VpcId: !Ref VPC
SecurityGropuIngressICMP:
  Type: AWS::EC2::SecurityGroupIngress
  Properties:
    GroupId: !Ref SecurityGroup
    IpProtocol: icmp
    FromPort: 8
    ToPort: 8
    CidrIp: 219.100.133.243/32
SecurityGropuIngressInternal:
  Type: AWS::EC2::SecurityGroupIngress
  Properties:
    GroupId: !Ref SecurityGroup
    IpProtocol: -1
    SourceSecurityGroupId: !Ref SecurityGroup
SecurityGropuIngressSSH:
  Type: AWS::EC2::SecurityGroupIngress
  Properties:
    GroupId: !Ref SecurityGroup
    IpProtocol: tcp
    FromPort: 22
    ToPort: 22
    CidrIp: 219.100.133.243/32
Here we have three AWS::EC2::SecurityGroupIngress rules, so the end result looks like this on AWS Console:
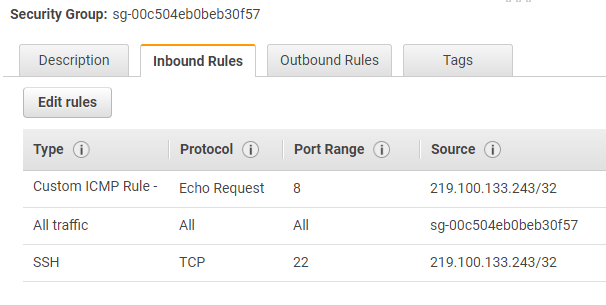
With CloudFormation, you typically define AWS::EC2::SecurityGroupIngress separately from AWS::EC2::SecurityGroup, and reference SecurityGroup from SecurityGroupIngress by:
GroupId: !Ref SecurityGroupYou might have wondered why I had separate AWS::EC2::SecurityGroupIngress, and why I didn't put SecurityGroupIngress components inside AWS::EC2::SecurityGroup, which is described in the official reference. The reason why I suggested separate AWS::EC2::SecurityGroupIngress was that it allows you define self-referencing Security Group rule as below:

which is defined by SecurityGropuIngressInternal in the above template.
Security Group is an EC2-level concept, so in the next section, we associate the Security Group with EC2. (More precisely, Network Interface.)
EC2 Instance
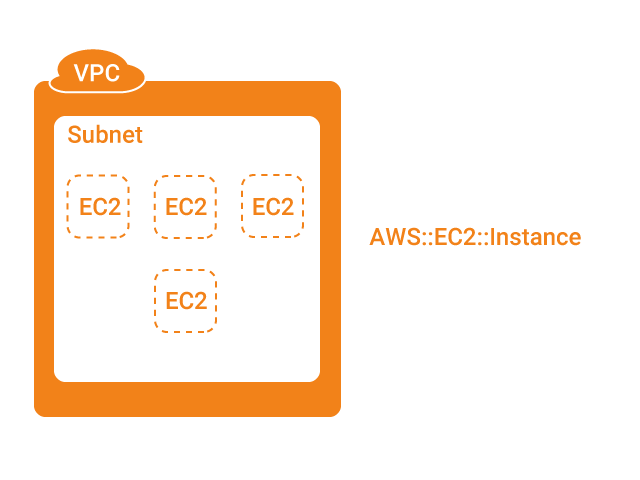
Finally let's set up EC2 instances. There are mainly three important things for EC2:
- Enough root EBS storage space for Docker containers -
BlockDeviceMappings - Security Group should be associated within
NetworkInterfaces UserDatafor Docker installation
The below configuration is only for one EC2 instance, and the rest can be found in the full template.
# Define EC2 instance for WRK and its associated volumes
EC2InstanceWrk:
  Type: AWS::EC2::Instance
  Properties:
    ImageId: "ami-0d7ed3ddb85b521a6"
    InstanceType: m5.xlarge
    KeyName: "performance-test-key-pair"
    UserData:
      Fn::Base64: |
        #!/bin/bash
        # ...
        # omit the UserData details as it's too long
        # see the full template at https://gist.github.com/richardimaoka/9dc0dc952e35920479c1fa7caee8a3a7
        # ...
        service docker start
    # Associate EC2 with the Security Group
    NetworkInterfaces:
      - AssociatePublicIpAddress: "true"
        DeviceIndex: "0"
        GroupSet:
          - !Ref SecurityGroup
        SubnetId: !Ref Subnet
    # Volume of 20GB is allocated as TechEmpower docker containers have serveral hundred MBs in sizes
    BlockDeviceMappings:
    - DeviceName: /dev/xvda
      Ebs:
        VolumeSize: 20
        VolumeType: gp2
    Tags:
    - Key: Name
      Value: tfb-client
Now you can SSH to the controller EC2 instance and kick off the TechEmpower framework as follows:
// replace 1.2.3.4 with the actual controller EC2's public IP
> ssh -i .ssh/your-aws-ssh-key.pem ec2-user@1.2.3.4
then:
// replace the IPs with actual internal IP addresses of the respective EC2 instances
./tfb  --test h2o \
  --network-mode host \
  --server-host 10.0.0.207 \
  --database-host 10.0.0.149 \
  --client-host 10.0.0.216